

There have not been a lot of posts to this blog site recently, so I decided to repeat one of my recent blog posts from my other blog site to not only give you something substantial to read, to learn, and to use, but also as a way to introduce you to my other blog site which has been active since 2010 and which has focused on both SharePoint and Power BI at least during most of that time. This blog posts reflects on some of the things I’ve learned about OneNote which everyone in OCPS has access to through Office 365, at least at the time of this posting. One of the great things about Office 365 is the integration between products included in Office 365 and the ability to connect different products together and also the functionality provided in them over and above the basic features found in similar products. In this blog post, I wanted to talk about one small hidden gem in OneNote that makes it a superior note taking experience. Okay, maybe not hidden so much as underutilized, at least by most people. That hidden gem is ‘tags’ within OneNote.
Although I have been using OneNote for several years, I have to admit that initially I did not think of tags as more than just decoration inside my OneNote pages. I’ve used the To Do square tag when making lists of things I needed to do. The cool thing about them was that when I first added them to an item in a list, the square would first appear as unchecked and by simply clicking on the square, I could toggle between unchecked, checked, and back again. I also would star important items in a page of notes to indicate the most important points so that I could find them easily enough 6 months (or even 6 weeks) later. The same thought applied to the Question Mark tag which I would use to mark thoughts where I needed to conduct more research or contact others about. I might have used a few other tags over the years, but I really did not think too much about them other than as a visual marker of where certain types of information appeared on a page.
I hadn’t even noticed that you could define your own custom tags, perhaps because I rarely scrolled all of the way to the bottom of the list of available tags. However, last year I discovered this feature. It was the first step on my path of using tags more productively. Let me first show you how easy it is to create a custom tag.
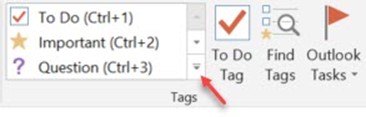
You begin by opening the tag list by clicking on the bottom box on the right side of the tag list which is commonly referred to as the More button. (The Tags group can be found in the Home ribbon of OneNote if you are having trouble finding it.)
Scrolling to the bottom of the list is the option: Custom Tags… Clicking on this option displays the Customize Tags dialog box shown below.
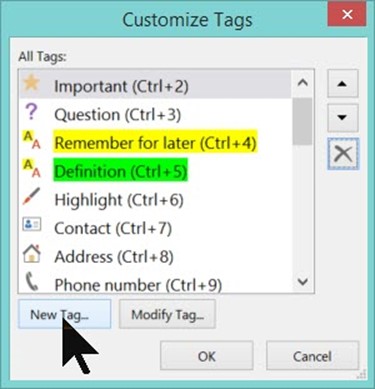
To create a new tag, click on the New Tag button as shown above to display the New Tag dialog.
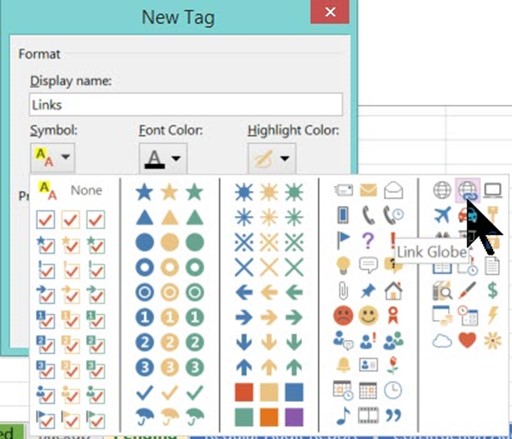
The first thing you must supply is the Display name or the Tag name if you prefer. This name should be unique amongst the existing list of available tags. This is important because the symbols, font and highlight colors do not have to be unique among all the define tags.
After specifying a name, symbol, font color, and highlight color, click the OK bottom at the bottom the dialog. This action adds your new tag to the top of the list. It also gives it the keyboard shortcut: Ctrl_1. You can move the tags in the list to reflect the tags you use most to appear near the top of the list. You could also order the tags alphabetically, but that is not as practical. Why? Because the further down the list you have to look, the harder they are to find. Secondly, the first 9 tags are given shortcut keys (Ctrl+1 to Ctrl+9) beginning at the top of the list. Note however that the shortcut keys are not really a function of the tag, but of the tag’s position in the list. You can click on a tag in the Customize Tags dialog and then click on the up or down arrow keys to the right of the list to change the tag order. Notice that as you move a tag up or down, the shortcut key for that tag (as well as the one it jumped over) changes to keep the order of the shortcuts fixed from the top of the list.
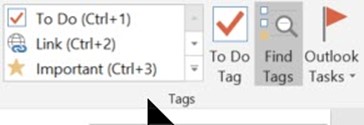
You can see in the image below that the new tag I created with the name Link which began with the shortcut Ctrl+1 when it was first added was changed to Ctrl+2 when I moved it down to the second position in the list.

When you close the Customize Tags dialog by clicking the OK button, the tag order and the shortcut keys are set as shown in the Customize Tags dialog.
Now to use the tags, you can select the text in the notepad page and select the tag you want from the Tags list, or if the tag is one of the first nine tags from the top, you can use its shortcut key combination such as (Ctrl+2) for the Link tag. You don’t even have to select the text. If you select a tag, it will appear at the beginning of the current line for a single line note or at the beginning of the paragraph for a multi-line note. Even if the information you want to tag is in the middle of a line, the tag appears at the beginning of the line, not just to the left of the selected text. As an example of that, look at the image below in which I selected the site URL and then pressed Ctrl+2 from the keyboard to add the link tag.
Any line or paragraph can be tagged with any one or more of the available tags. If you have more than a single tag, they all appear to the left side of the text. After tagging items on your page, you should easily be able to spot the important information in any page your OneNote notebook.
For a long time, that is all I thought you could do with tags. But that does not showcase the real power of tags. To be fair, I guess the real power of tags does not become important until you have dozens of pages and subpages within multiple tabs within one or more notebooks, much like the notebooks in your office. Let’s say you have 50 to 100 pages of notes within a notebook perhaps representing different projects, different meetings, different notes, etc. How would be begin to find all of your To Do items or all of the links, or all of the phone numbers you have stored? One way of course would be to perform a search on a unique word, portion of a word or even a word phrase. In fact, Search allows you to find a unique string of characters across multiple pages in multiple tabs across multiple notebooks that you have open.
That is pretty powerful, but you must know the unique string you want to search for and there is no way to limit the search to perhaps just the pages within the current tab or to perform the search in such a way as to find all of the links or phone numbers at once. Furthermore, what if you do not remember a unique string or what if the string might appear in multiple places in different contexts? Or what if you wanted to find all the links in the current notebook? In these cases, Search may not be the right tool.
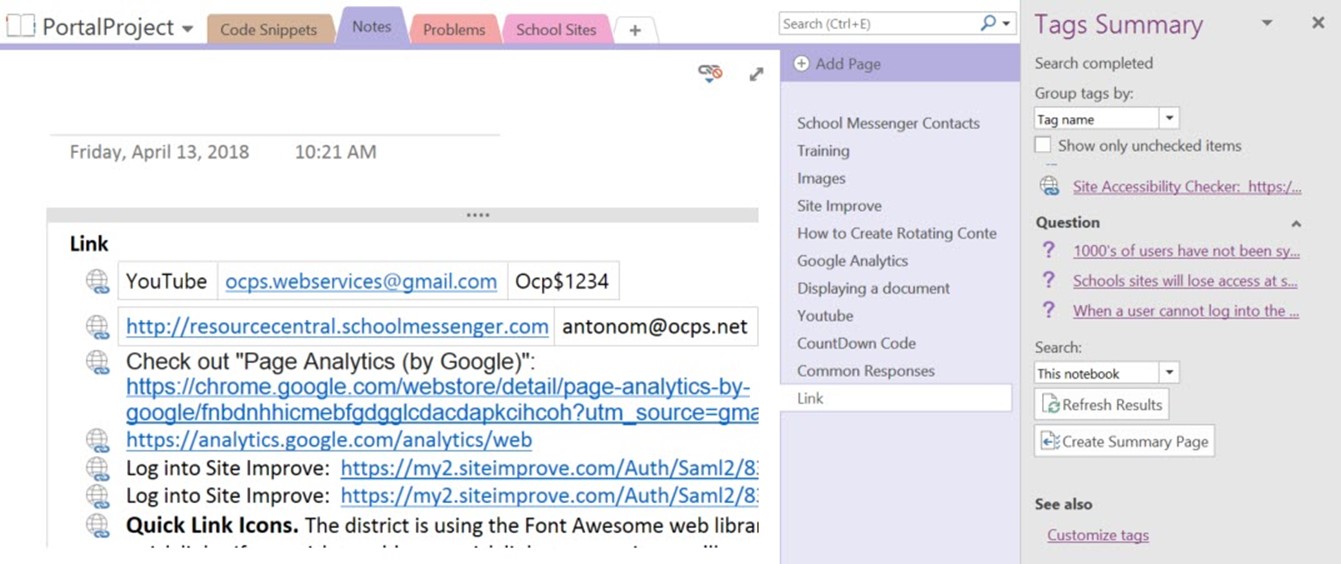
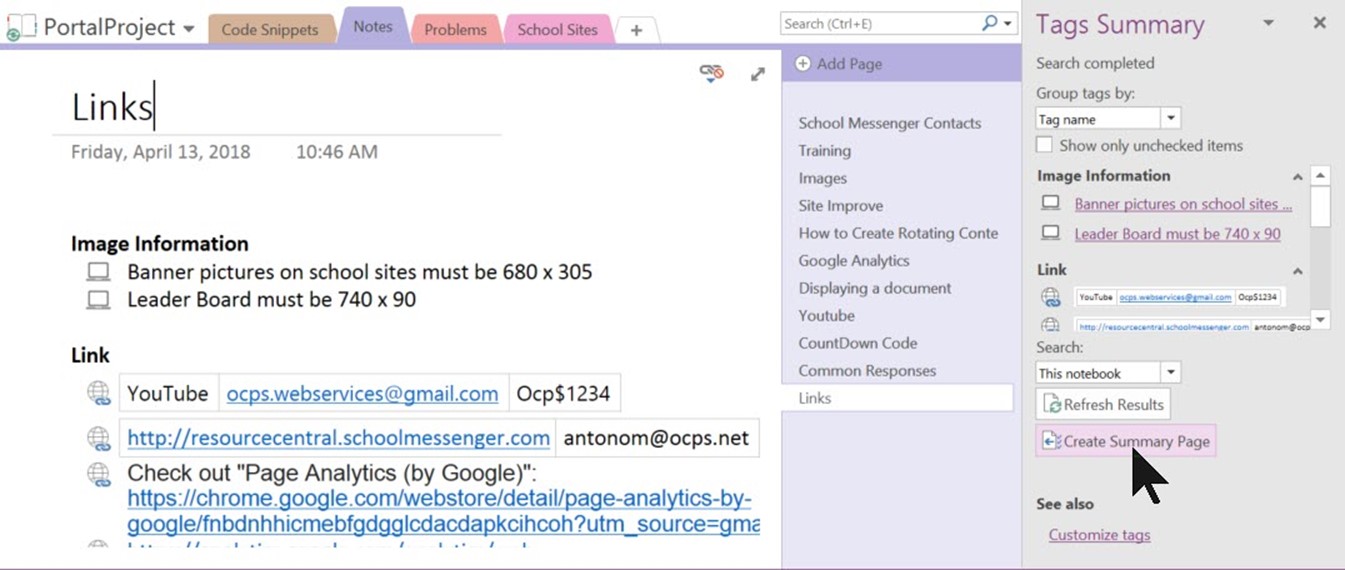
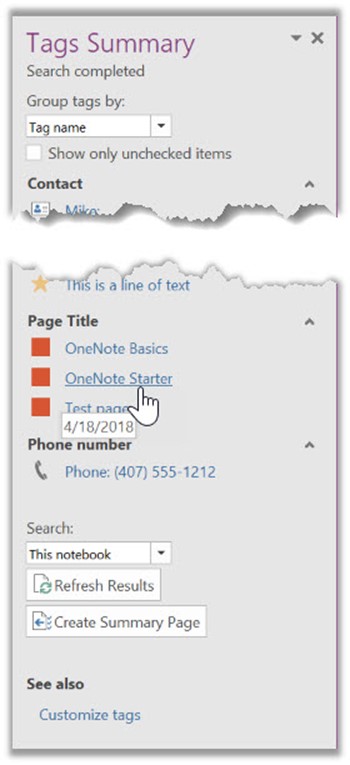
To the right of the tag dropdown list on the Home ribbon is an option called: Find Tags. When you click this option, a panel appears along the right side of the screen titled: Tags Summary which lists all of your tags grouped by tag name as a default (see why tag name is important?). An example of this panel is shown in the next image. To jump to the page for any of these tags, just click on the label associated with each tag in the Tags Summary panel. However, if you have used a large number of tags to tag a large number of items on multiple page and tabs within your notebook or notebooks, this list can be rather large (don’t worry, OneNote will automatically create a scrolling list) and you may want to click on the option at the bottom of this panel to create a summary page which adds another page to the notebook listing all the tags used within the notebook. Unfortunately, you cannot click on the labels associated with the tags here to go to the page where the tag was defined like you can when you click within the Tags Summary panel. But all is not lost. If you hover of any of the tags in this summary list, you will see a small OneNote icon to the left of the entry. Simply slide your cursor over and click on this icon to go to the page referenced page.
Now if you notebook is as active as mine is, the Summary Page of tags will soon become obsolete as you add more content and tags it. You might have noticed the other button at the bottom of Tags Summary panel that says: Refresh Results. You could click on this button. However, beware that if you created a Summary Page, the tags found here will be repeated resulting in many repeated tag references. Not good! If you want to refresh results, you need to first delete the existing Summary Page, click Refresh Results, and then create a new Summary Page.
Another way you can limit the size of the Tags Summary details is to use the Search option found just above the Refresh Results button. This option lets you select the scope of the summary from a page group up through all the notebooks you have open (The default is the current notebook). You can also specify which tags to display based on their age from today’s tags to yesterday’s tags, this week’s tags, last week’s tags, or older tags.
Before I end this blog post, let me give you one last hint on using tags. Suppose you have a notebook with hundreds of individual subpages, pages, and tabs. How can you find the page you want if you know the name of the page but not under which tab it can be found? Why not use a tag to tag the page names themselves. Then when you create a, the section of the summary for that special tag that you use only for page names will create a Table of Tag Summary Contents list with the pages listed alphabetically. Just find the page you want and click on the page name to go to that page.
And if you like generating a Table of Contents of your pages within OneNote, think about creating a Table of References, a Table of Definitions, a Contact List, etc. There is no limit to the imaginative ways you can use tags to organize your OneNotes.