
(and how to fix them)
First remember to resize images with the aspect ratio turned on. For the school banner, the aspect ratio is 680×305 or a factor of 2.23 horizontal pixels for every vertical pixel.
I’ve talked before that if you have images in your school’s rotating banner that have different sizes, that the text below could jump up and down as different images appear. While such minor jumping of the text is an annoyance and should be corrected, there is also a problem with school banners that only have a single image that is improperly sized.
The following image shows a school banner in which the uploaded banner image was sized as: 640 x 178.
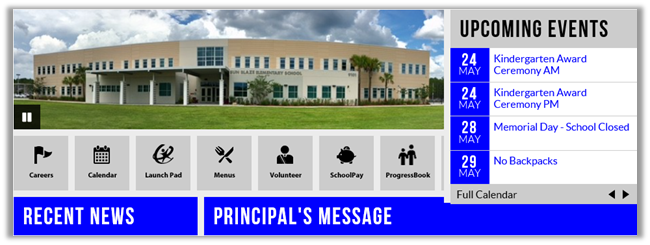
The portal resizes images to fit the width of the banner which is 680 making the actual display size 680 x 189. (680/640 x 178) That means that the image height as displayed is only 189 pixels (680 / 640 x 178). This results in the image being too short by 116 pixels because the height as displayed should be 305 pixels. Therefore the Quick Links portlet and everything beneath it moves up to fill in this empty space. However, the Upcoming Events Portlet rides over top of the rest of the portlets on the page and therefore overlaps the right side of the Quick Links hiding several of the icons.
One method to fix this would be to resize the image without locking the aspect ratio to 640 x 287 (which does ratio to 680 x 305). However that will distort the image, although most people might not notice (distortion is more evident when people are in the photo and they get stretched or squashed).
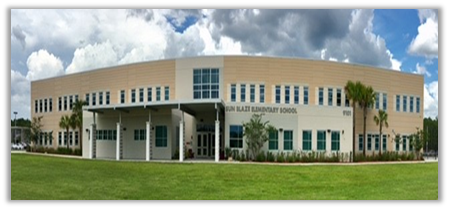
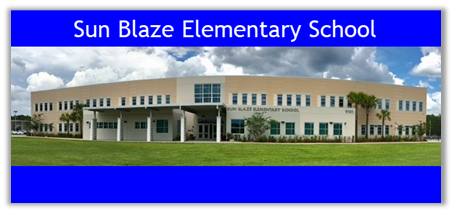
Another possibility would be to use a graphics program and to extend the background of the image (the canvas) to 640 x 287 but not resize the picture. Then color the extra canvas area with a color (such as the school’s primary color or a complementary color) and center the image in the resized canvas, maybe even adding text in the border area as in:
(If you do not have a graphics program that separates the image from the background canvas, you can do this by following these steps.
- Open and load the 640 x 178 image into Paint and copy the image to the clipboard.
- Next create a new image that is the final size (640 x 287) and filling it with your background color, blue in this case.
- Now paste the image from the clipboard onto the new blue rectangle and center by eye vertically on the blue rectangle.
- Add any text along the top or bottom.
- Save the image.
Then upload the new image into the banner. When you re-publish the page, the banner is the same size as the Upcoming events which means the Quick Links are correctly shown beneath both the banner and the Upcoming events as shown below.
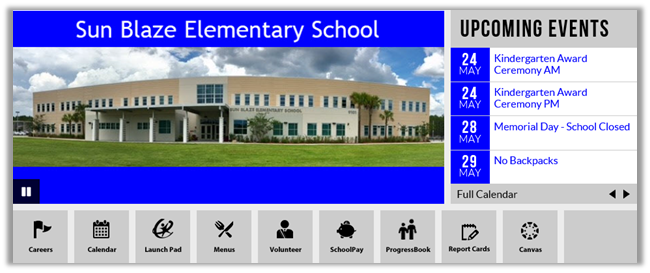
Yes, getting the image right in the banner takes a little math, but it is just ratio math. When done correctly, you can create images for your banner that both looks good and does not cause the page to jump up and down when multiple images of different sizes display or hide other parts of the page.