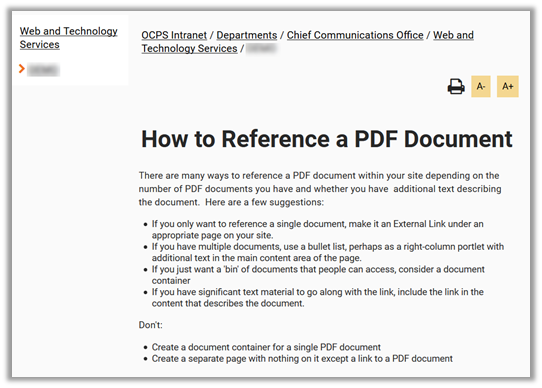

Let’s say you have a document with the following text in the main Page Content area (although this technique will work in any content portlet) which you first directly typed your text into the design area.
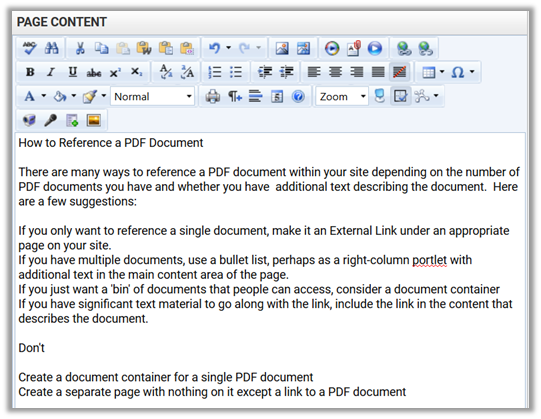
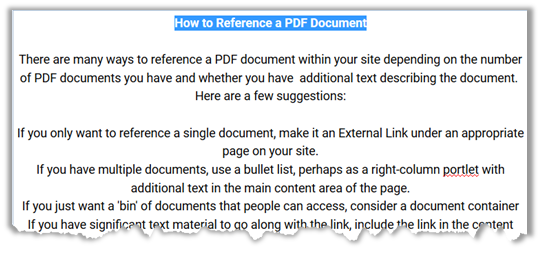
Initially, all of the text is entered as Normal text which is a predefined font and style that has been established to help keep the look of all OCPS pages consistent. Let’s say you attempted to bold and center the first line as a title. After highlighting the first line and selecting the Bold icon, the first line would become bold. However, you attempt to center the line (still selected), it will center all of the text as shown below:
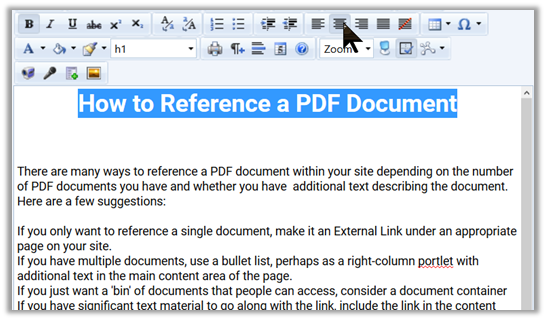
Additionally, you may notice that there is no option to change the font size of the header to make it stand out. We can solve both of these issues as well as help the vision impaired navigate a longer document by defining headers (sections of similar text) as shown below. NOTE: Headers are NEVER used merely to format the text, but because the line “How to Reference a PDF Document” is really a logical topic heading in the text. It is a side benefit that a heading in this case will also help format the text. NEVER use headers solely to format text. However if the text should be a header of a section, take the freebee of formatting the text while defining content sections within your page.
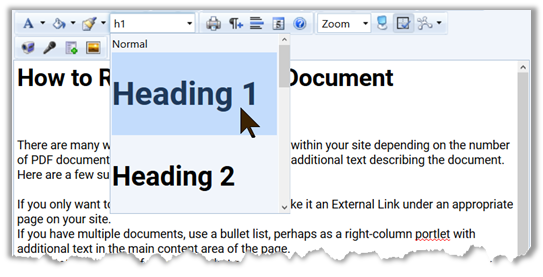
[Editor’s note: When this picture was taken, it showed the selection of Heading 1. Since this post was originally created, we now understand that a web page can only have a single Heading 1 and that is defined internally as the site name. You can start with Heading 2 or Heading 3 (Heading 2 is also used automatically as the page name but pages can have multiple Heading 2 elements.)]
Now I can select the title line and click center without centering all of the content in the text block. This is a side benefit of defining the section text as a header. If it were not a header, you would have to define the block of text by insert hard paragraph characters before and after the text you wanted to justify differently.
Why did the rest of the text not center this time? The fact that the text is treated as two separate text blocks, one defined by the header style and one define by the normal style is the reason. The justification buttons will only apply to the text within the current text block no matter how much of the text is selected.
Next we want to convert the lines that begin with ‘If you…’ into a bulleted list rather than separate paragraphs. If you were to select these lines and click the bullet button, you might be surprised to find that it just places a single bullet at the start of the text section, not in front of each of the lines selected. Why?
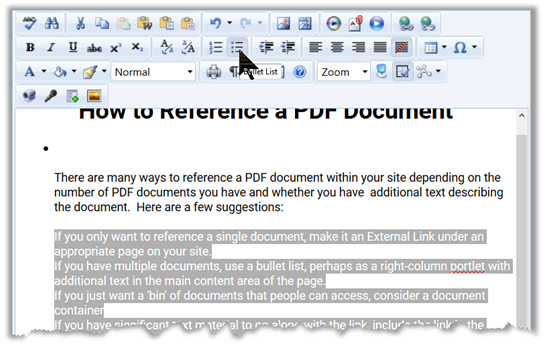
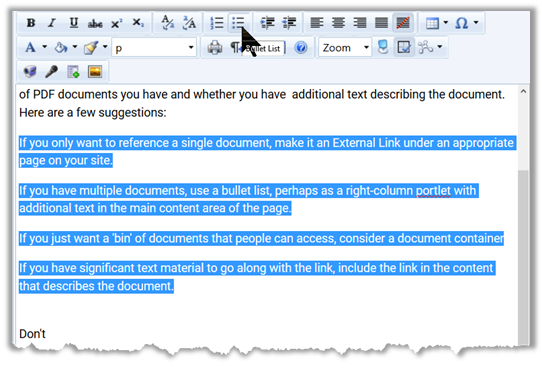
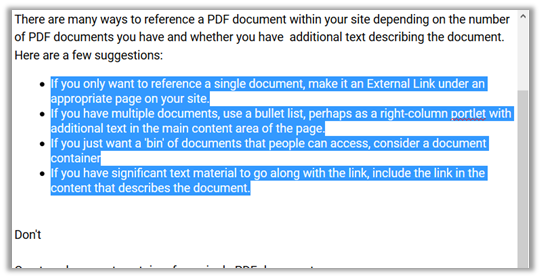
The answer is related to what we said about justification. It is treating the text in the second block (the non-title block) as a single text item and placing a single bullet at the start of that block. So how do we get each line to be treated as a separate item for the bullet list? You have to use the New Paragraph button (the one that looks like a backward ‘P’) to isolate the lines by adding this paragraph marker at the start of each line at one fine one after the last text line. Then when I select these lines and click the bullet button, I get the list I want.
Finally, I finish formatting the page and I’m ready to publish it.